Preperation
TODO:
there’s a helper script to automatically generate these templates, should be referenced and used here.
explain some wide screen shenanigans on single map-tile width rooms.
Before we set up tiles or textures, we must first make some preperations. There is an automatic way and a manual way to do these, with the automatic way being preferred.
There is an UTMT script that will simplify the room creation process. First, follow the steps of the scripts section.
After that, execute the NewRoomScript.csx script. This will create a 320x240 room for you, with all the other prerequisites already set.
You can now change the room size and the room name.
For the room size, make absolutely sure that the dimensions are multiples of 320 x 240 as otherwise it will cause issues in-game.
For the room name, it is recommended to follow the naming convention of all the other rooms in the game: start with rm_, then the area your room belongs to (a0, a1, a2, etc.), a letter to denote which subsection of that area you are in (h for outside, and then a, b, etc.) and finally the number of the room itself (01, 02, 03, etc.).
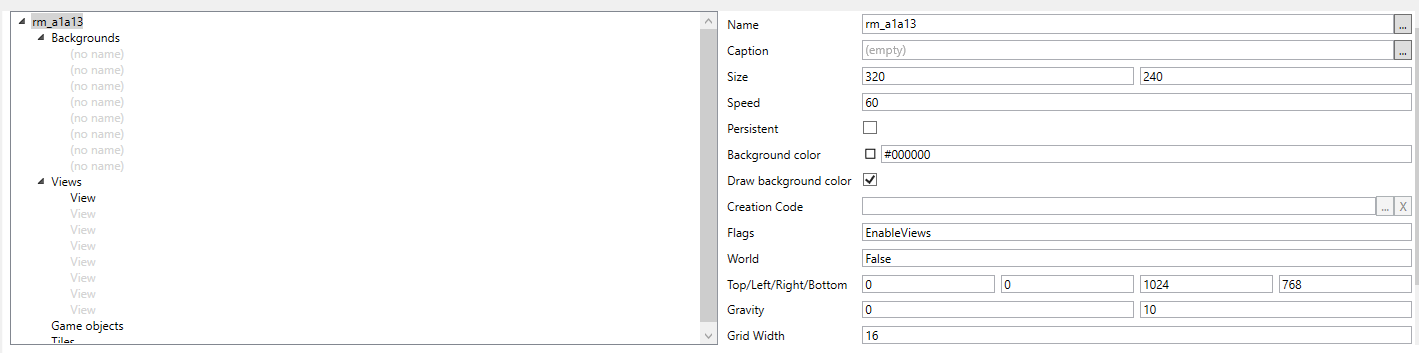
If you were adding a room inside Golden Temple for example, you would name it something like rm_a1a13. But of course you can use any names you like.
Add one screenshot
To get started, create a new room by right-clicking on Rooms in the viewer on the left and then click add. Now you will see 3 things;
- At the top left, a list of all objects that are in your room.
- At the top right, a set of values, corresponding to the element that you currently have selected.
- At the bottom, a visual overview of your room. If you’re adding a new room, this will be completely gray.
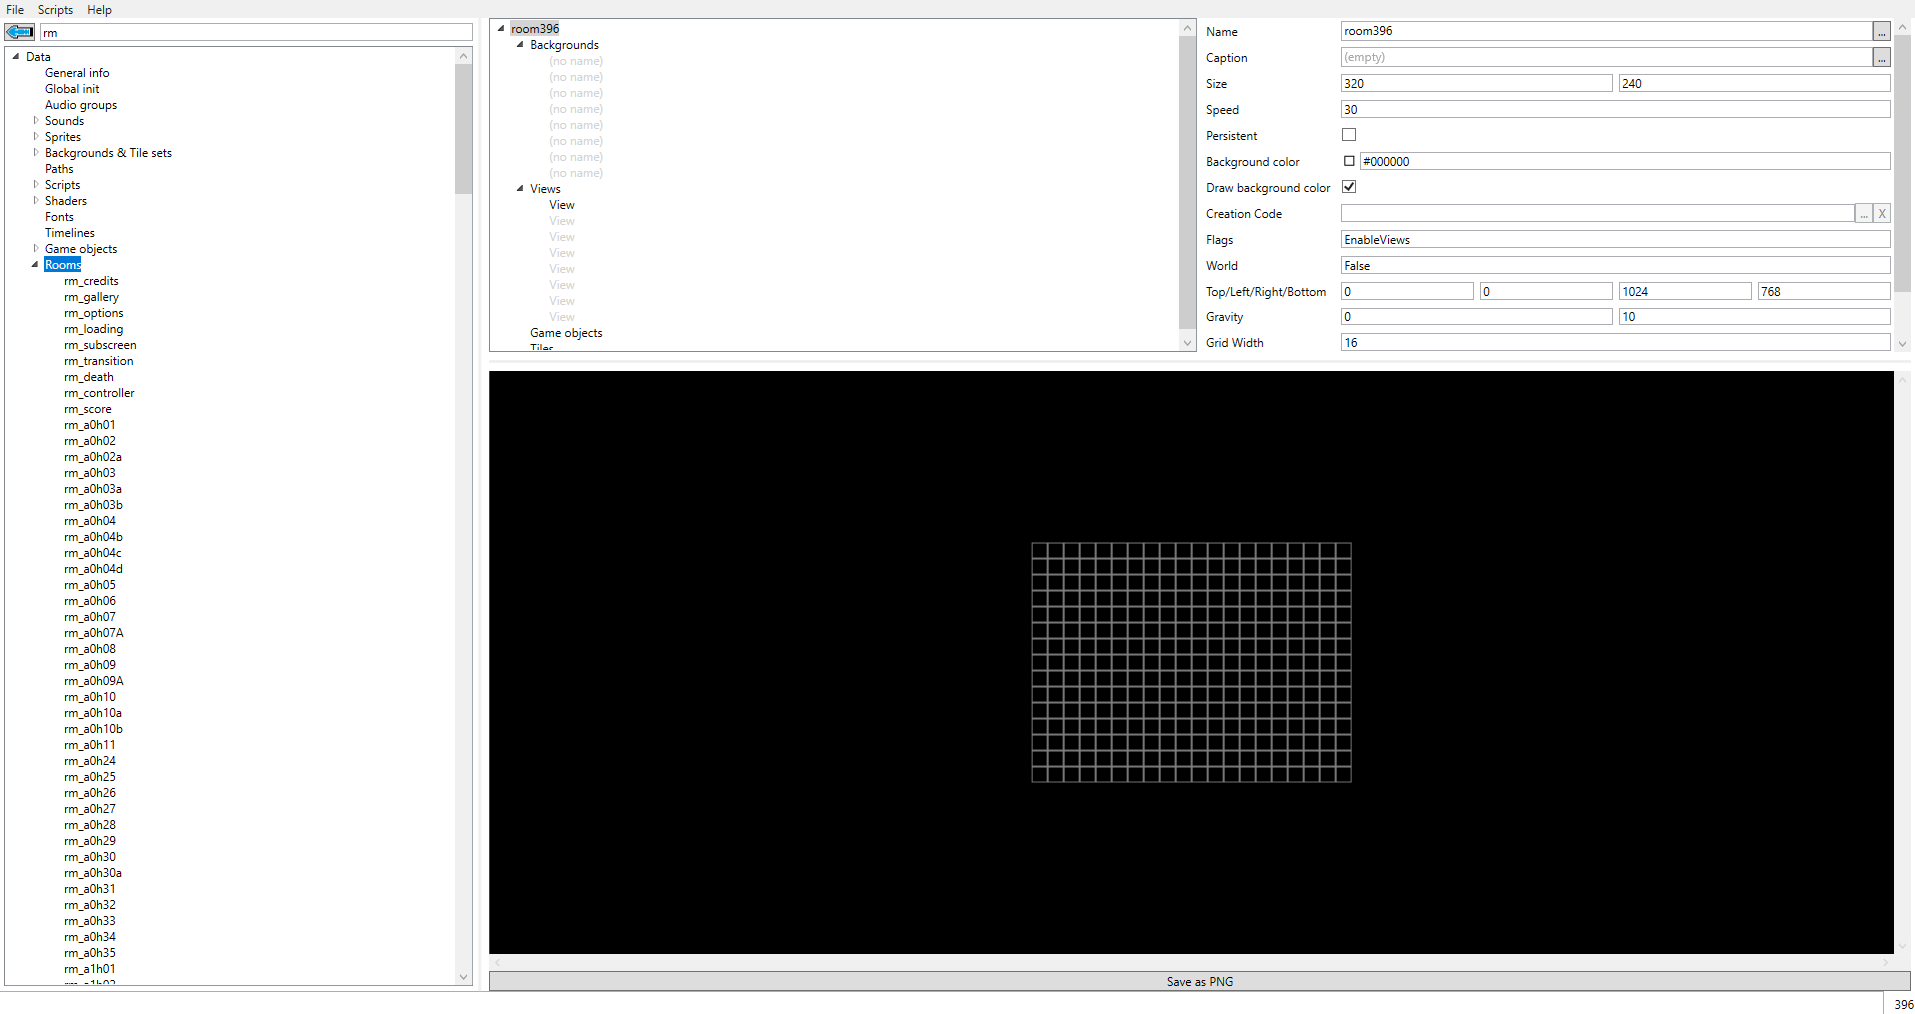
When creating a new room, make absolutely sure the dimensions are multiples of 320 x 240. Having different room dimensions will cause lots of troubles. Also make sure that the room speed (Speed) is set to 60 as that’s the framerate AM2R runs at. Entering different values will lead to the room being slowed-down or sped up.
You probably also want to give your room a name. For this, it is recommended to follow the naming convention of all the other rooms in the game: start with rm_, then the area your room belongs to (a0, a1, a2, etc.), a letter to denote which subsection of that area you are in (h for outside, and then a, b, etc.) and finally the number of the room itself (01, 02, 03, etc.).
If you were adding a room inside Golden Temple for example, you would name it something like rm_a1a13. But of course you can use any names you like.
UTMT does not sort things alphabetically. Instead it always puts the newest addition at the bottom of the list. This means that, if you’re not making multiple rooms at a time, your current room will always be at the bottom of the list.
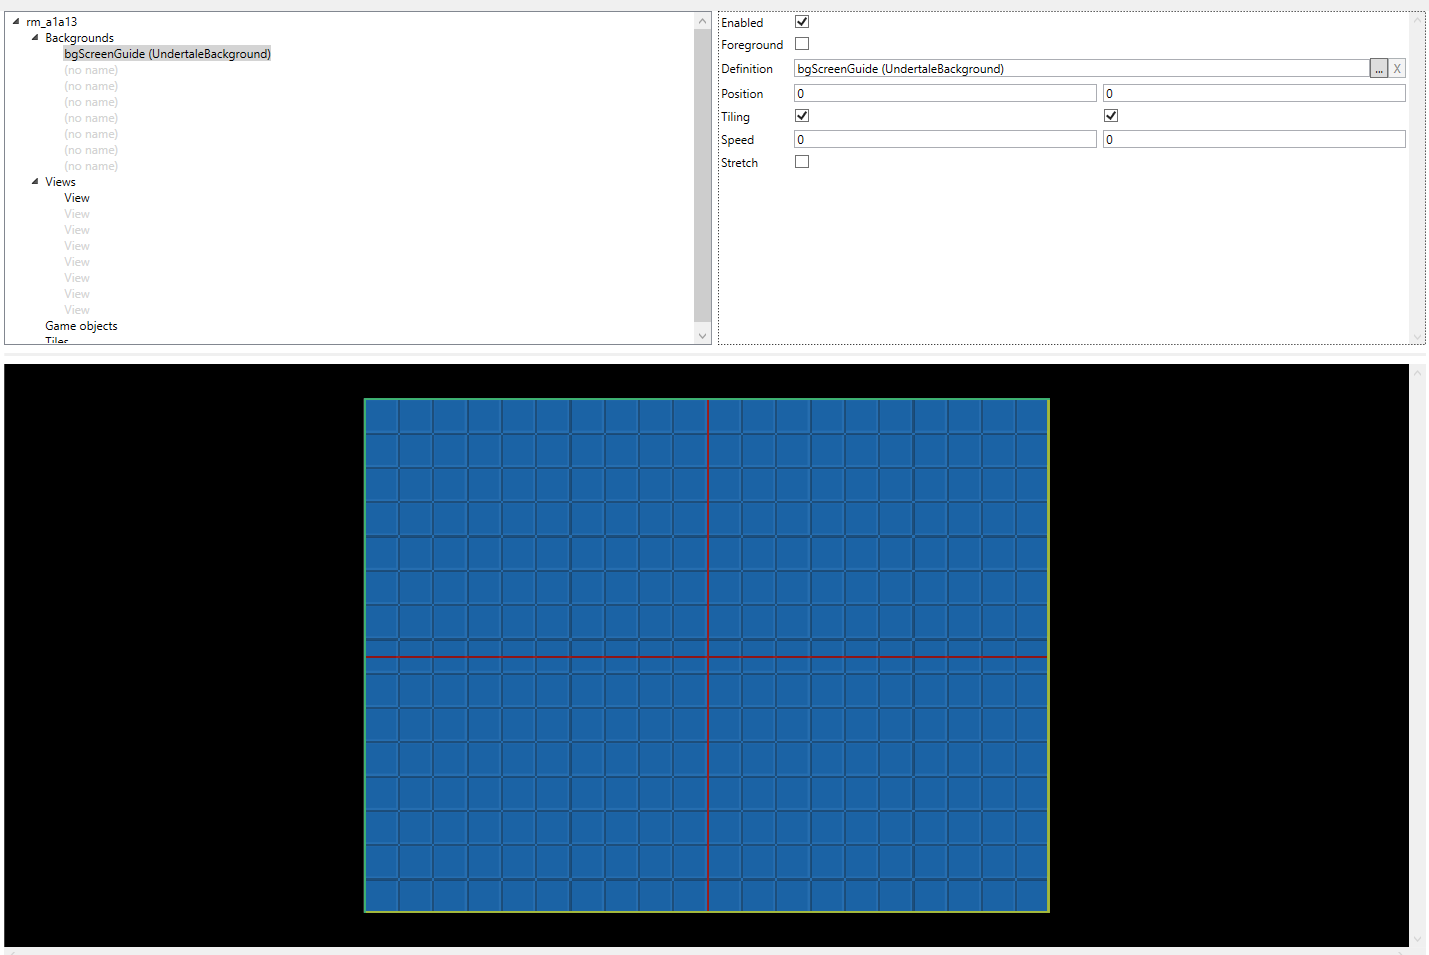
Once you have your set room size click on one of the (no name) elements under the backgrounds tab. Set a background by searching for bgScreenGuide and drag-and-droppig it into the Definition Space of the (no name) element. Enable the background afterwards.
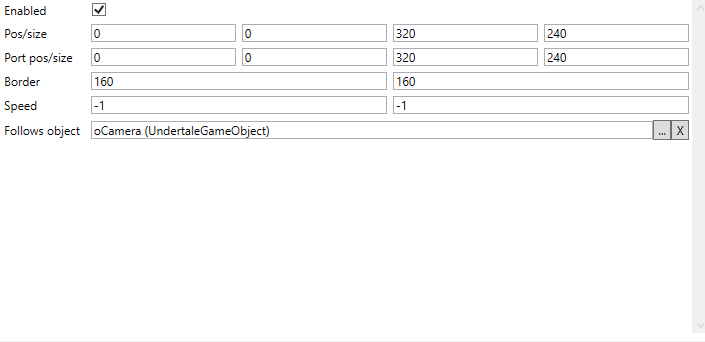
Next, click on the Views category, and then click on the first View. Set its Pos/size values to 0, 0, 320, 240, regardless of room size. Set the Port pos/size values to 0, 0, 320, 240 as well. Set Border values to 160, 160. Make sure Speed values are at -1, -1. Lastly, to make the camera follow the player, put oCamera into the Follows object box.